Top Ten DIY tips to improve your home
Written by Andrew Dunning of APD Interiors
Read APD Interiors’ blog here – www.apdinteriors.com
1. Repaint your front door – EASY
 The front door is the first thing anyone sees when they arrive at your home but it is also the most often neglected area of a home. A new look entrance can be achieved in a simple weekend project involving the preparation to the door and then the application of two well applied coats of paint. You may want to consider a new look for your door – if you currently have a high gloss dark coloured door, would a matt finish in a pastel shade suit your home and make it stand out from your neighbours? While you are tidying up the front door also think about the general area. Replacing the house number adds a nice finishing touch and there are many contemporary options available on the market – signs in acrylic give a smart modern look.
2. Repaint a room – EASY
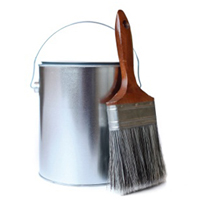 If your home feels tired this can easily be resolved by just repainting one room and this job can usually be completed in one day. After you have chosen your colour you need to ensure you have the correct type of paint. If you are painting a kitchen or bathroom you should remember that the paint has to be suitable for a high humidity environment, vinyl silk emulsion is a good choice. The key to achieving a good finish is good preparation, this is essential before you start any painting. Before you start remember to fill any cracks with smooth decorators filler, and then rub down when the filler has dried. Ensure all the walls and paintwork are dust free and then wash them all with sugar soap and rinse with clean water. After protecting all your furniture you are ready to start painting, start with the ceiling, move onto the walls and then do the woodwork. If the first coat does not produce the desired finish you may need to apply a second coat.
3. Clean the grout in your bathroom – MEDIUM
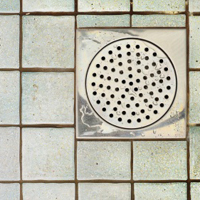 Over the years the grout in your bathroom can become dirty and this results in a bathroom that looks grimy. As grout is porous it easily absorbs dirt and grease and the chemicals contained in soap and shampoo. Although it can be a long slow task cleaning the grout will easily return your bathroom to its former glory. The first method to try is to use an old toothbrush and a proprietary cleaner to tackle the grime. If the cleaner has anti-mould qualities it will help to break down the mould and also help to stop it reappearing. If possible try to keep the room ventilated as the fumes from some cleaners can be toxic. If this method doesn’t produce good results you can purchase a grout remover and carefully remove the existing grout. You can then apply a top coat of new grout and the bathroom will look like new.
4. Lay a wooden floor – MEDIUM
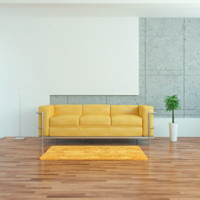 Adding a wooden floor to your home adds a highly desirable finish to a room and is also a great finish to live with. Laying the floor is a DIY task that anyone with simple skills can do, you just need a willingness to plan, be able to work methodically and some patience! There are hundreds of different types of flooring available, and choosing one designed for DIY will help you in the task. Many floors simply click together allowing you to produce a perfect finish. Before you start ensure you have all the tools you need, and also purchase the correct underlay – you also need to decide which way you want the floor to run. Follow the manufacturer’s instructions to lay the floor, many boards comes with a simple locking mechanism to join the boards together with a perfect join. You will probably need to cut the final boards to fit, and then either reapply the skirting board or apply a wooden baton to cover the expansion gap.
5. Decorate a feature wall with wallpaper – MEDIUM
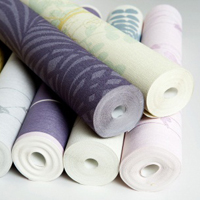 Adding a feature wall to your home can add a very modern aspect to any room and liven up your interior, and if this is your first time wallpapering doing just one wall is a good introduction. Choosing a high quality thicker paper will allow you to produce a good result easier, and a plain textured paper is an easier choice than one requiring pattern matching. As with most DIY tasks good preparation is the key, ensure your wall is cleaned, washed and dry. You can now start to cut your paper, the lengths should be cut around 100mm longer than you require to allow for trimming. If you have a paper with a large pattern hang the first piece in the centre of the room, otherwise start in a corner. Remember to follow the manufacturer instructions when choosing which paste to use. After the first piece gradually work your way to the edge of the walls, cutting each piece as you go until you have completed the wall.
6. Put up shelving – EASY/MEDIUM
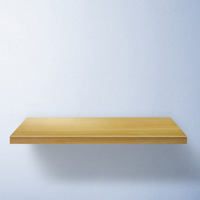 Every home needs storage and adding shelving to your home can help you get organised. There is a huge selection of shelving available and you can have them in wood, MDF or glass – they can be either bought ready-made or you can buy the materials and make a shelf that will fit exactly. Before you begin to hang the shelves you need to know what type of walls you have. For brick or concrete walls you will need to use heavy duty wall plugs, if you have stud walls you can either screw into the stud or use hollow wall fittings. This is one place where it is definitely worth spending extra money to get decent quality fittings. Another important thing is to ensure you know if there are any pipes or cables in the wall, you can buy a tester to help you with this. You can now mark the position of your brackets and after using a spirit level to ensure they are even, drill the holes and mount the brackets using the plugs and screws. You can now add your shelf and remember to screw it to the brackets to add extra rigidity.
7. Install coving – MEDIUM
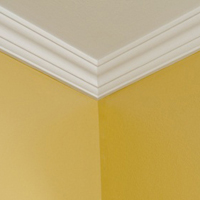 Adding coving to your home will give any room a finished look and it can add a nice architectural detail to plain rooms, especially important if your home is recently built. Coving is available in several different materials and price ranges. Polystyrene is the cheapest and easiest to install but it will require more painting and due to its construction it can be damaged easily. The best quality coving is made of plaster and requires less painting, it can also be purchased in many authentic period styles. Before you start the job you will need a saw and a coving mitre block to cut the corners. Start on the longest wall, cut the coving it to length and after applying good quality coving adhesive place the coving on the wall. To ensure a good fix you can use small nails above and below the coving to hold it in place until the adhesive has set. You can now move around the room using the mitre block to cut the angles for each corner. When you have finished you may need to apply some filler to the joints to get a smooth finish before you decorate. You can then apply a couple of coats of paint to finish the job.
8. Hang a new internal door – MEDIUM/HARD
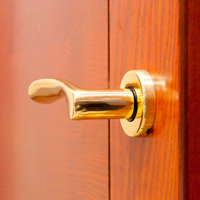 Many homes, especially new builds, are often fitted with inferior quality internal doors. Upgrading the doors to a higher quality is a medium skill DIY task that immediately improves the appearance of your interior. Internal doors are available from many DIY stores or you can have them made bespoke, although this option will produce more solid doors that may require more people to install them. After removing the old door you may need to cut the new door if needed, prepare for the new hinges and fittings and then hang the new door. This part of the process is usually much easier if you can have two people helping, one to hold the door while the other fixes it in place. You should now decorate the new door if it requires painting, and then finish the job by attaching the new door handles.
9. Declutter your home – EASY
 This advice is often given when you are preparing your home for sale but it can be relevant to any time. In the busy lives we all lead it is very easy to accumulate piles of paperwork or possessions we no longer require. A cluttered home will appear smaller and it won’t be a relaxing place to live in. Be sensible about this project though, it makes much more sense to break it down into separate rooms, don’t get so motivated you try and tackle the whole house – the motivation will soon diminish! Before you start designate an area for items to go to a charity shop, and another area for general refuse. Start working in one area, don’t do more than a couple of hours and come back and finish the room before moving on. Once this room is done it will spur you on to do the others!
10. Hire a handyman for a few hours – VERY EASY
 If you have a list of jobs you want to get done but really don’t know how to do them, don’t just keep putting them off – consider hiring a handyman for a few hours.
A handyman service can help you with plumbing, electrics, decorating or any general household DIY you don’t know how to do. Start by taking a walk around your home to list everything that you think needs doing as if you are going to hire someone, try to get everything done at the same time. Then seek a recommendation from a neighbour or find a handyman via the internet, and agree a price for the work.
On the day they visit ensure everything on your list is done, and then sit back and enjoy your home.


